Article
Getting Started with QSuite
Run your first analysis in seconds
Requirements to Run QSuite
Supported Browsers
To run QSuite you only need a modern browser installed on your computer. Supported browsers are Google Chrome, Microsoft Edge, and Mozilla Firefox. For best performance, make sure you have the latest versions of these browsers.
Updating QSuite
When a new version of QSuite is available, you will see a notification at the bottom of the application as shown in the image below.

Simply click "Update" to get the latest improvements and features.
Getting to Know the QSuite Interface
QSuite helps teams move from raw data to actionable decisions quickly.
The QSuite Workspace
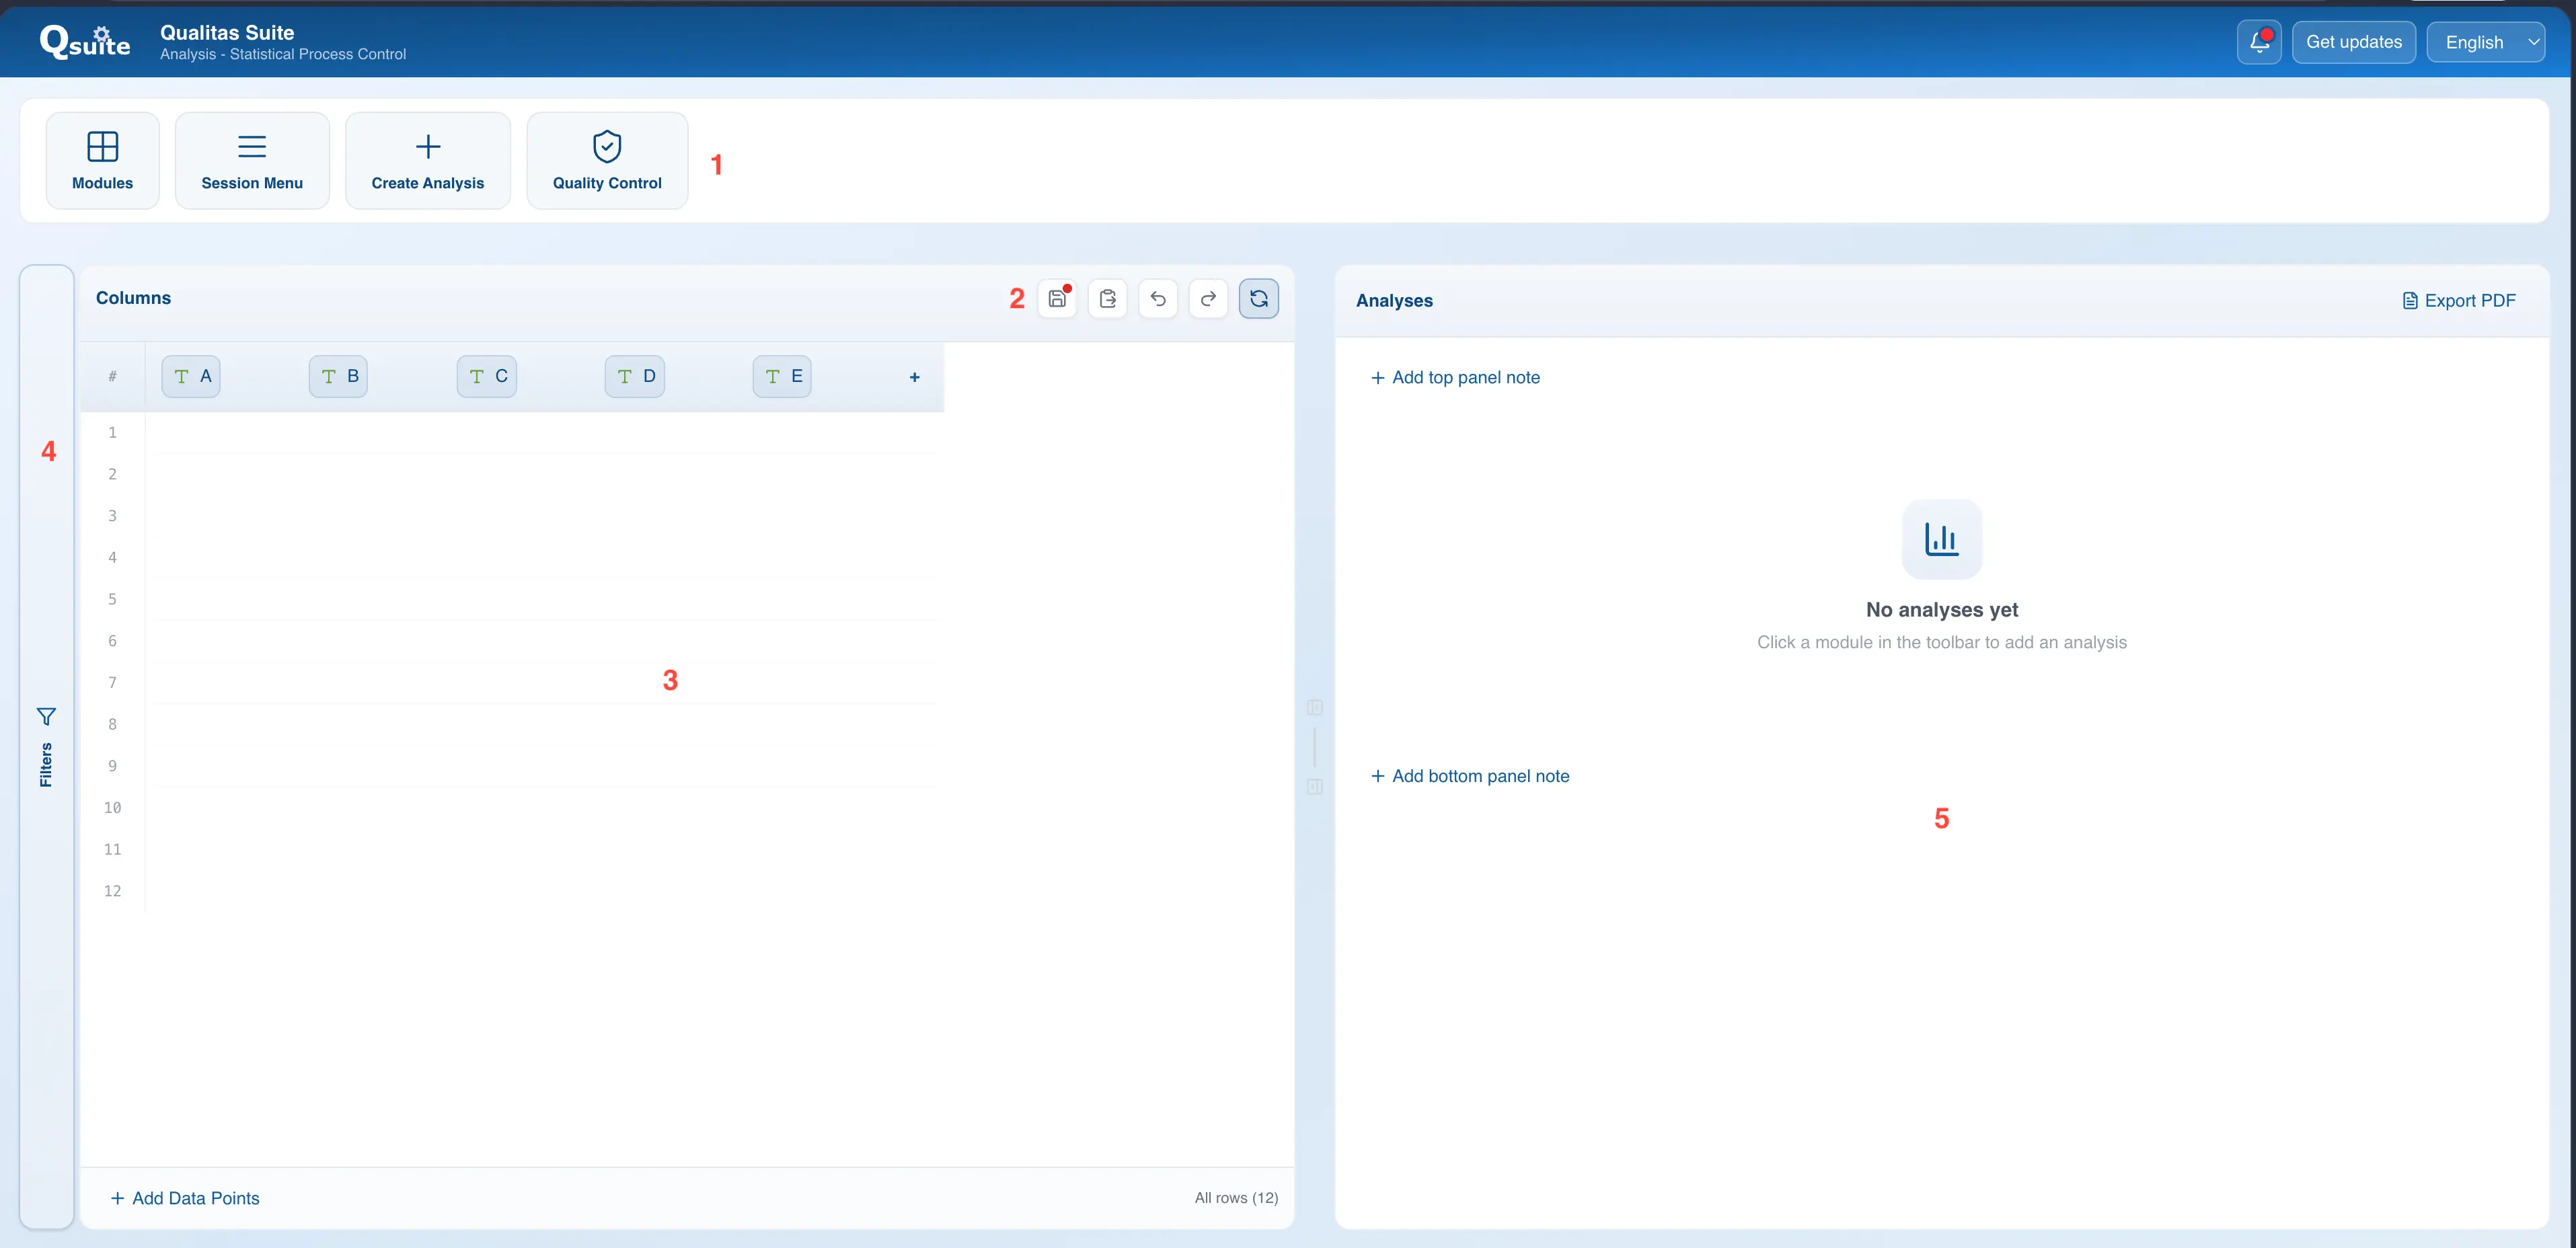
The QSuite interface is designed to make the most of your workspace and streamline your analyses. It is divided into the following sections:
- Toolbar: This section contains the different features of each QSuite module. For the data analysis module you will find the main menu, the menu for creating analyses, and another menu for quality control tools.
- Quick Access Bar: This bar contains icons that let you quickly access frequently used functions.
- Worksheet: At first glance the worksheet resembles a conventional spreadsheet, with one important difference: columns are draggable. This lets you build analyses quickly and easily.
- Filter Panel: The filter panel is hidden by default. Drag a column to the filter panel or click on it to start building powerful filters in a very simple way.
- Analysis Panel: This is where you will find the results of your various analyses organized in panels. You can add comments here and generate a PDF report of your analyses.
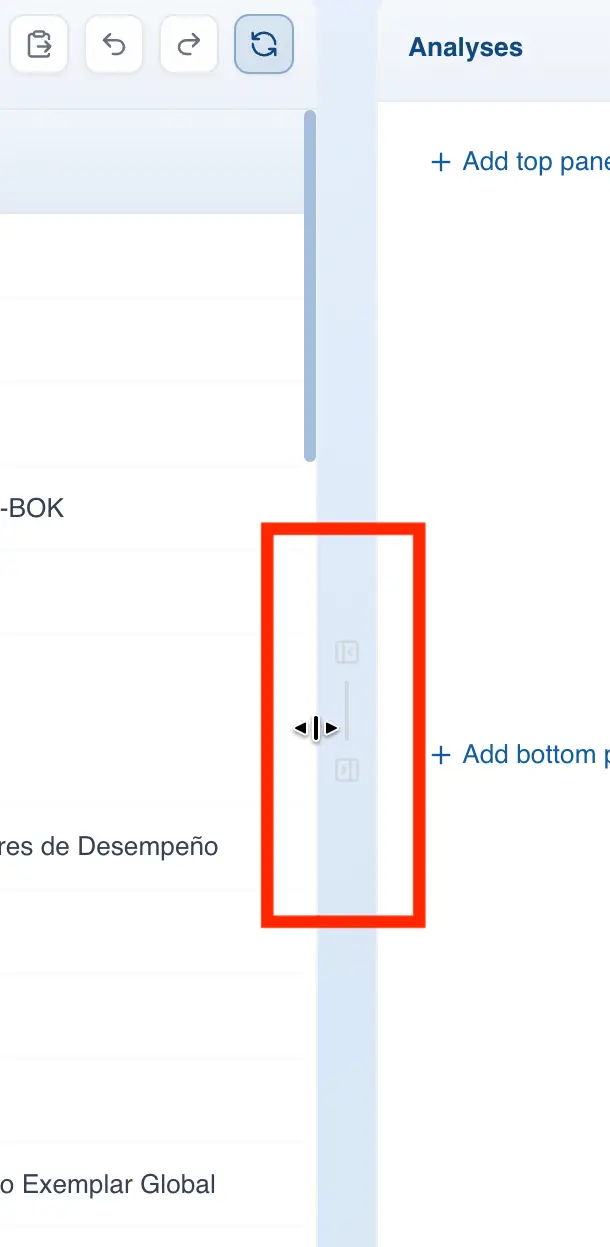
Customizing the Workspace
The QSuite interface is panel-based, allowing you to move and hide panels to create more space as needed.
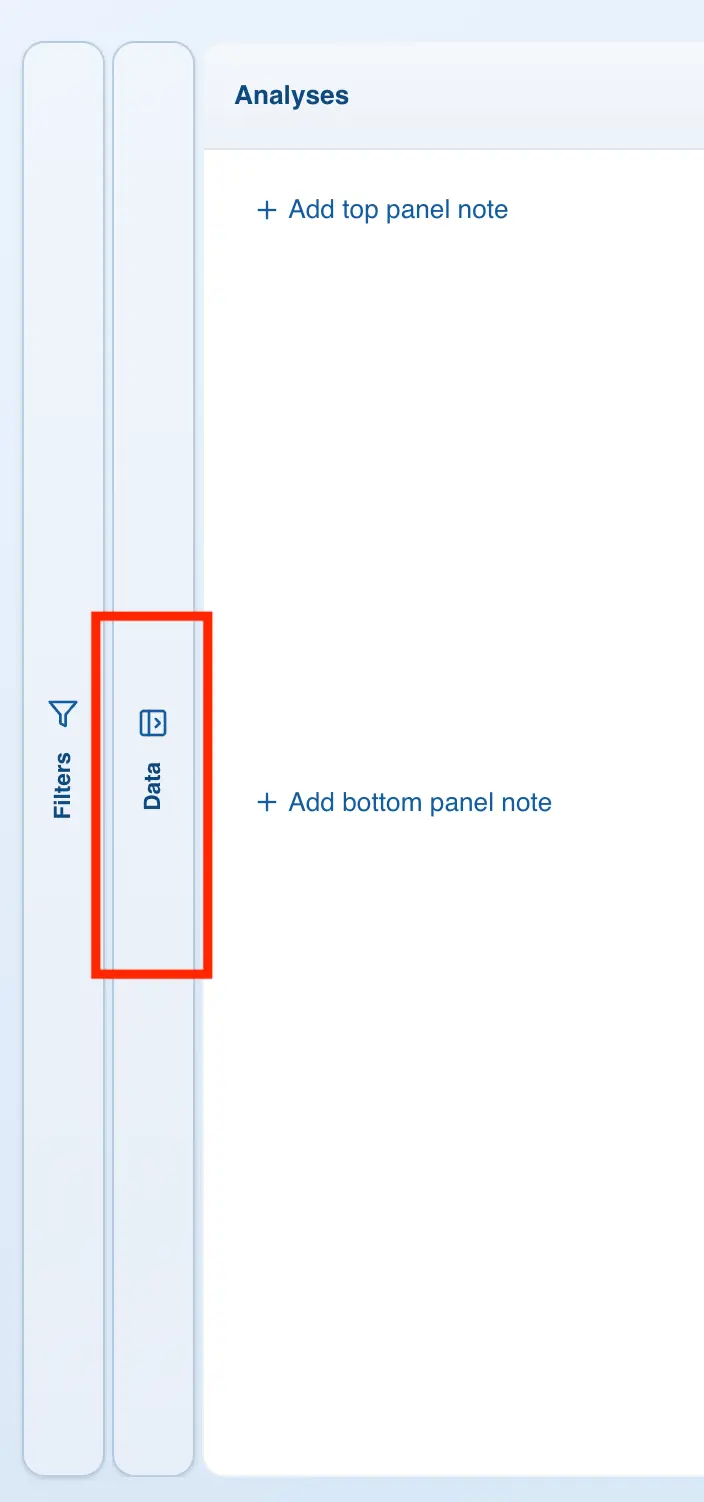
To resize panels, simply drag the dividing line between panels to the left or right as shown in the image below.
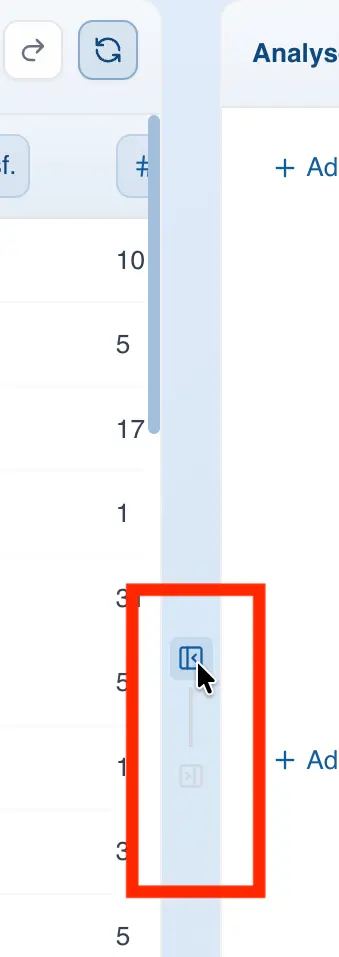
To hide the worksheet, click the button with the left-pointing arrow located above the dividing line.
Similarly, you can hide the analysis panel by clicking the button with the right-pointing arrow located below the dividing line.
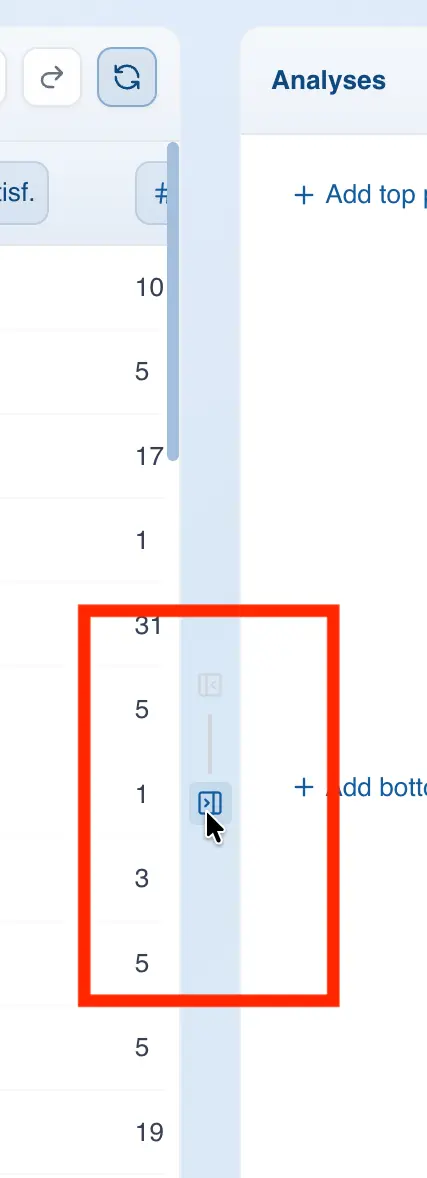
When you want to reopen a hidden panel, simply click on it.
Loading a Dataset into QSuite
Importing Your First Data File
You can load your data files into QSuite in several ways. The easiest way is to copy data from your favorite spreadsheet application and paste it into QSuite. To paste data, follow these steps:
- Click on the first column in the QSuite worksheet (Column A)
- Use the keyboard shortcut Ctrl + V on Windows or Cmd + V on Mac.
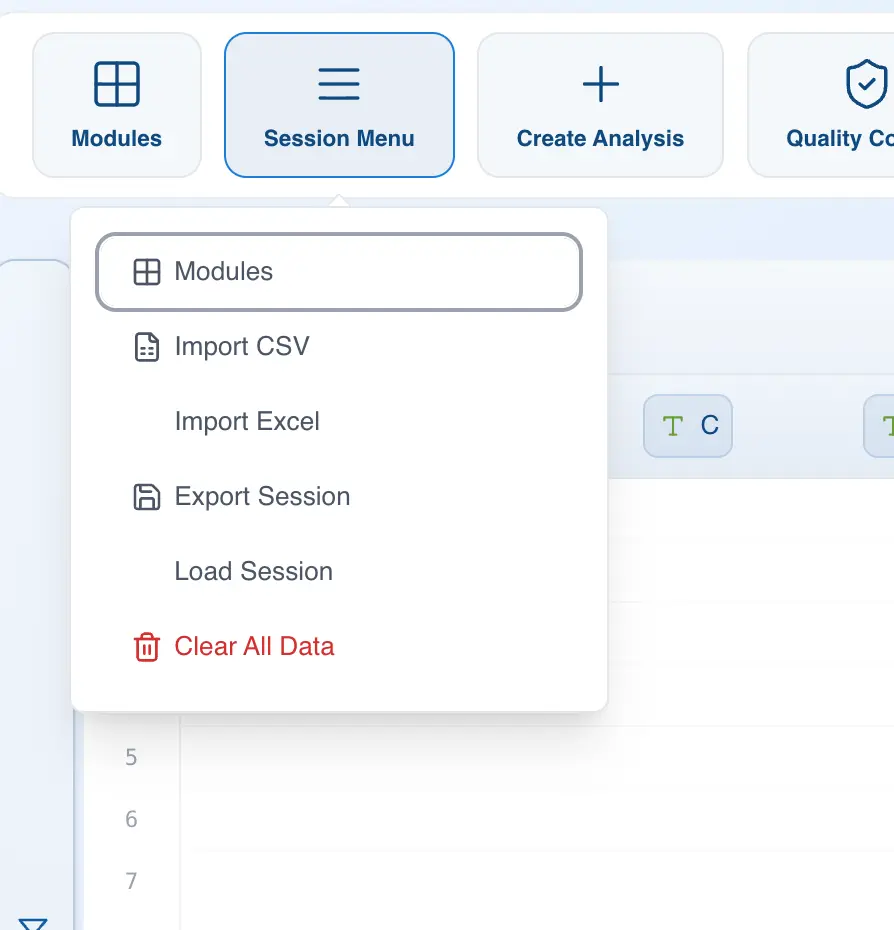
You can also import data files directly into QSuite. Currently, QSuite supports CSV and Excel formats. To import a file, follow these steps:
- Open the session menu
- Click "Import CSV" or "Import Excel" depending on the file format you want to use
- Browse to the file on your computer
- Click Open
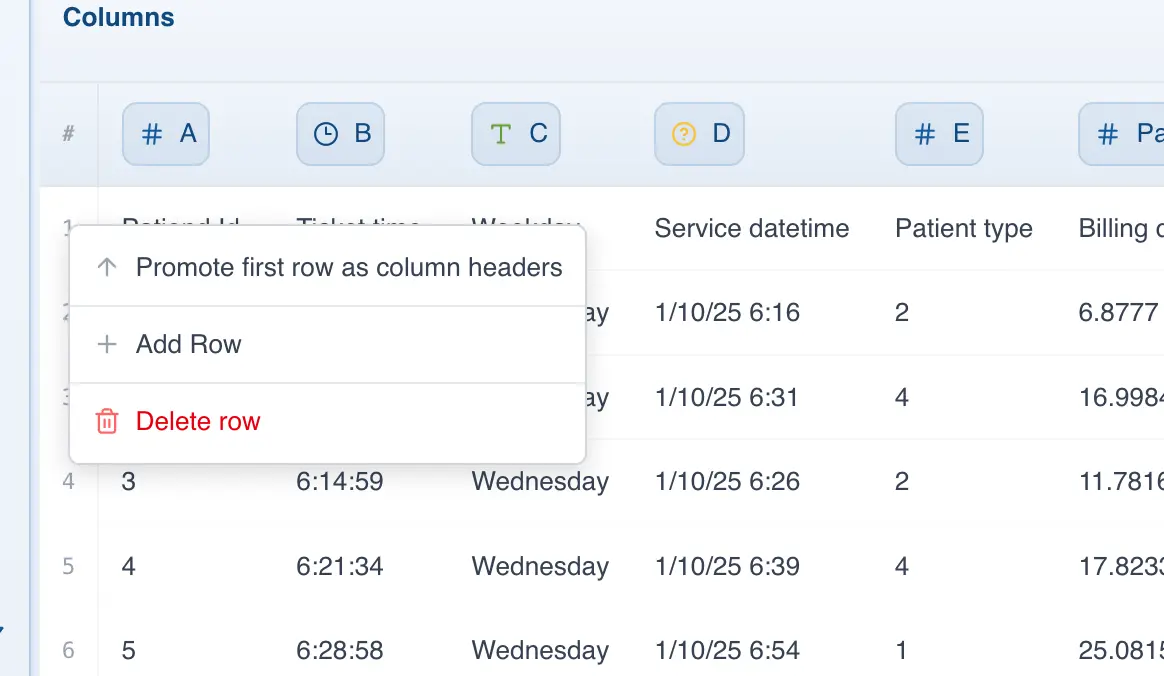
Promoting a Row to Column Headers
You can easily convert a data row into column labels. This is useful when you paste data from another program and the column headers end up in the first data row. To promote that row to headers, follow these steps:
- Right-click on the first row
- Select the option "Promote first row as column headers"
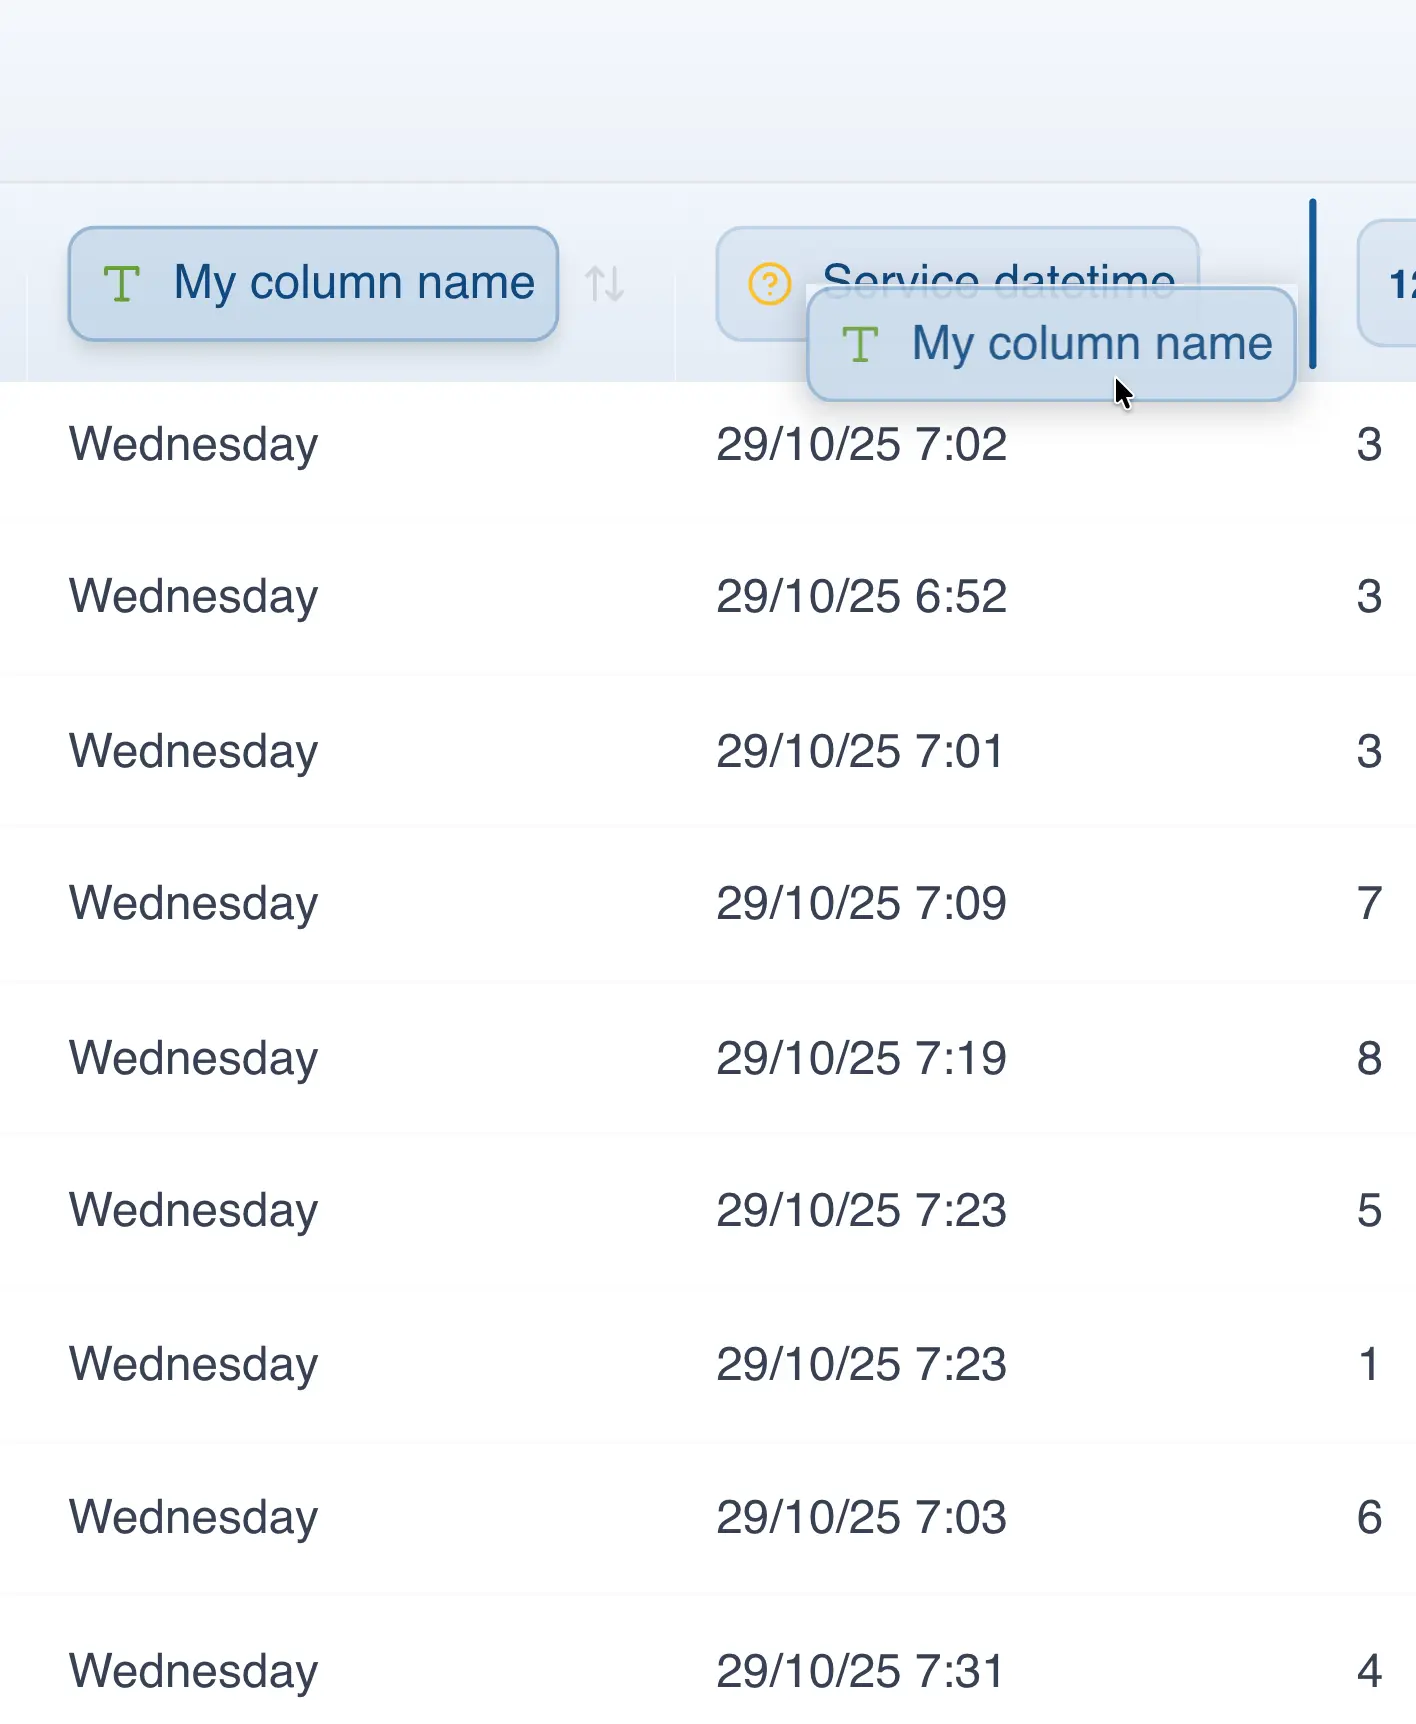
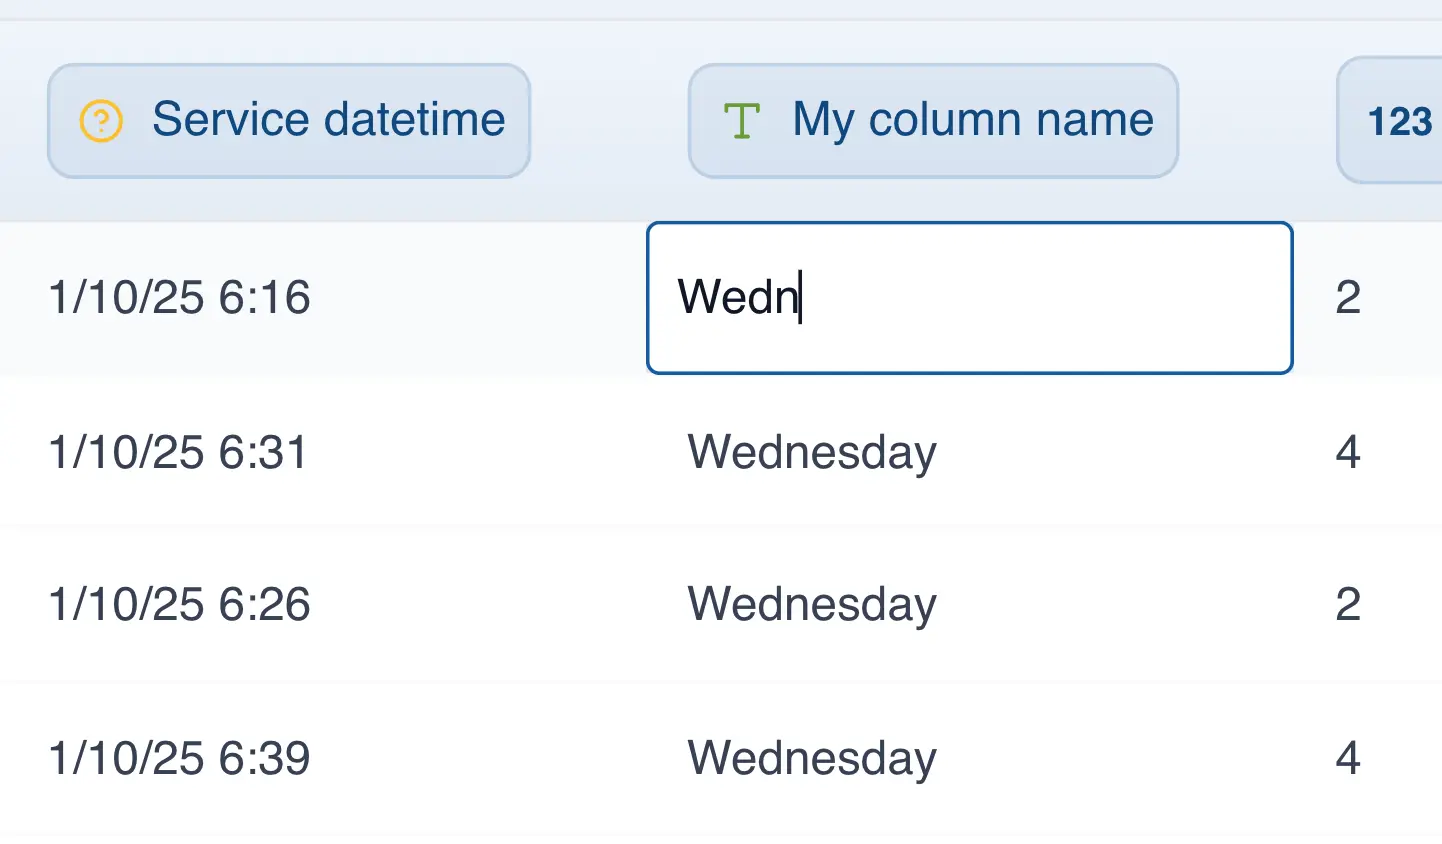
Renaming a Column
In QSuite you can rename a column by simply double-clicking on it. A text box will appear allowing you to type the name you want.

When you are done, click the checkmark button to save your changes.
Moving a Column
You can reposition a column in QSuite. To do so, simply drag the column to the position you want it to be in.
Entering Data Manually
You can edit the data in a cell by double-clicking on it. To confirm your changes, press the "Enter" key or simply click outside the cell.
Creating Your First Analysis in QSuite
Steps to Create an Analysis
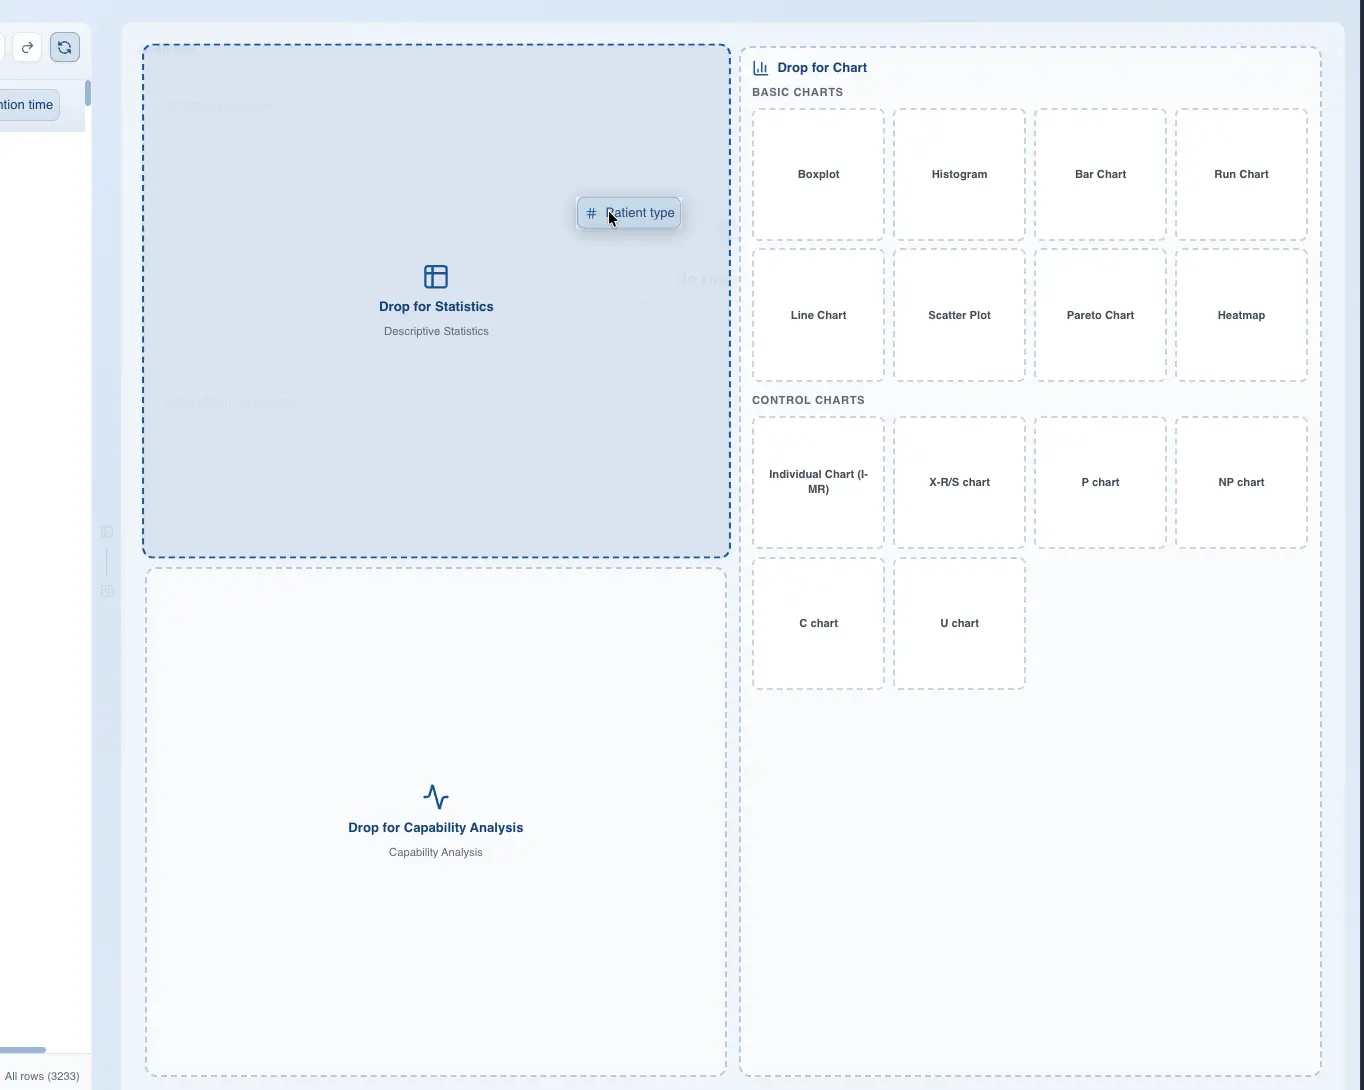
Creating an analysis in QSuite is very simple. Just drag the column you want to analyze to the analysis panel. When you drag the column to the panel, the different analyses you can perform will appear, as shown in the image below.
Configuring Your First Analysis
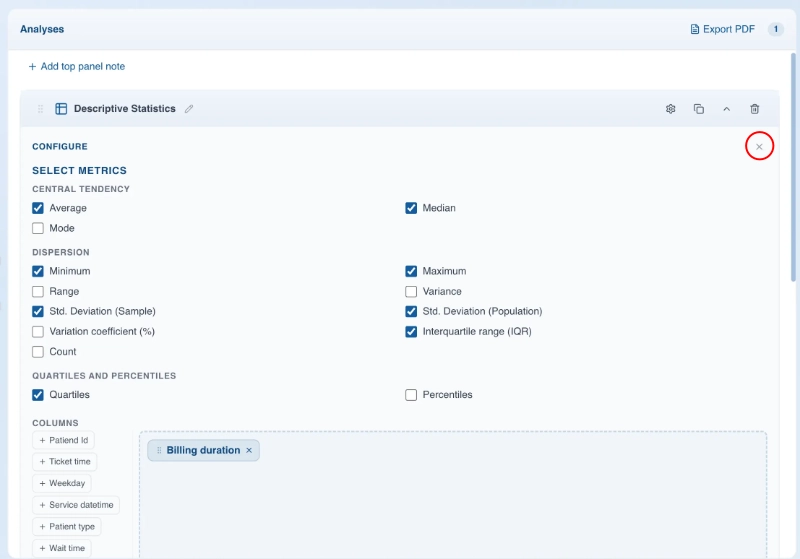
When you create an analysis you will have the option to configure it to your liking. The configuration options depend on the type of analysis you are performing. Once you have finished configuring the analysis, you can view your results by closing the configuration panel by clicking the "X" close button, as shown in the image below.
Export and Share
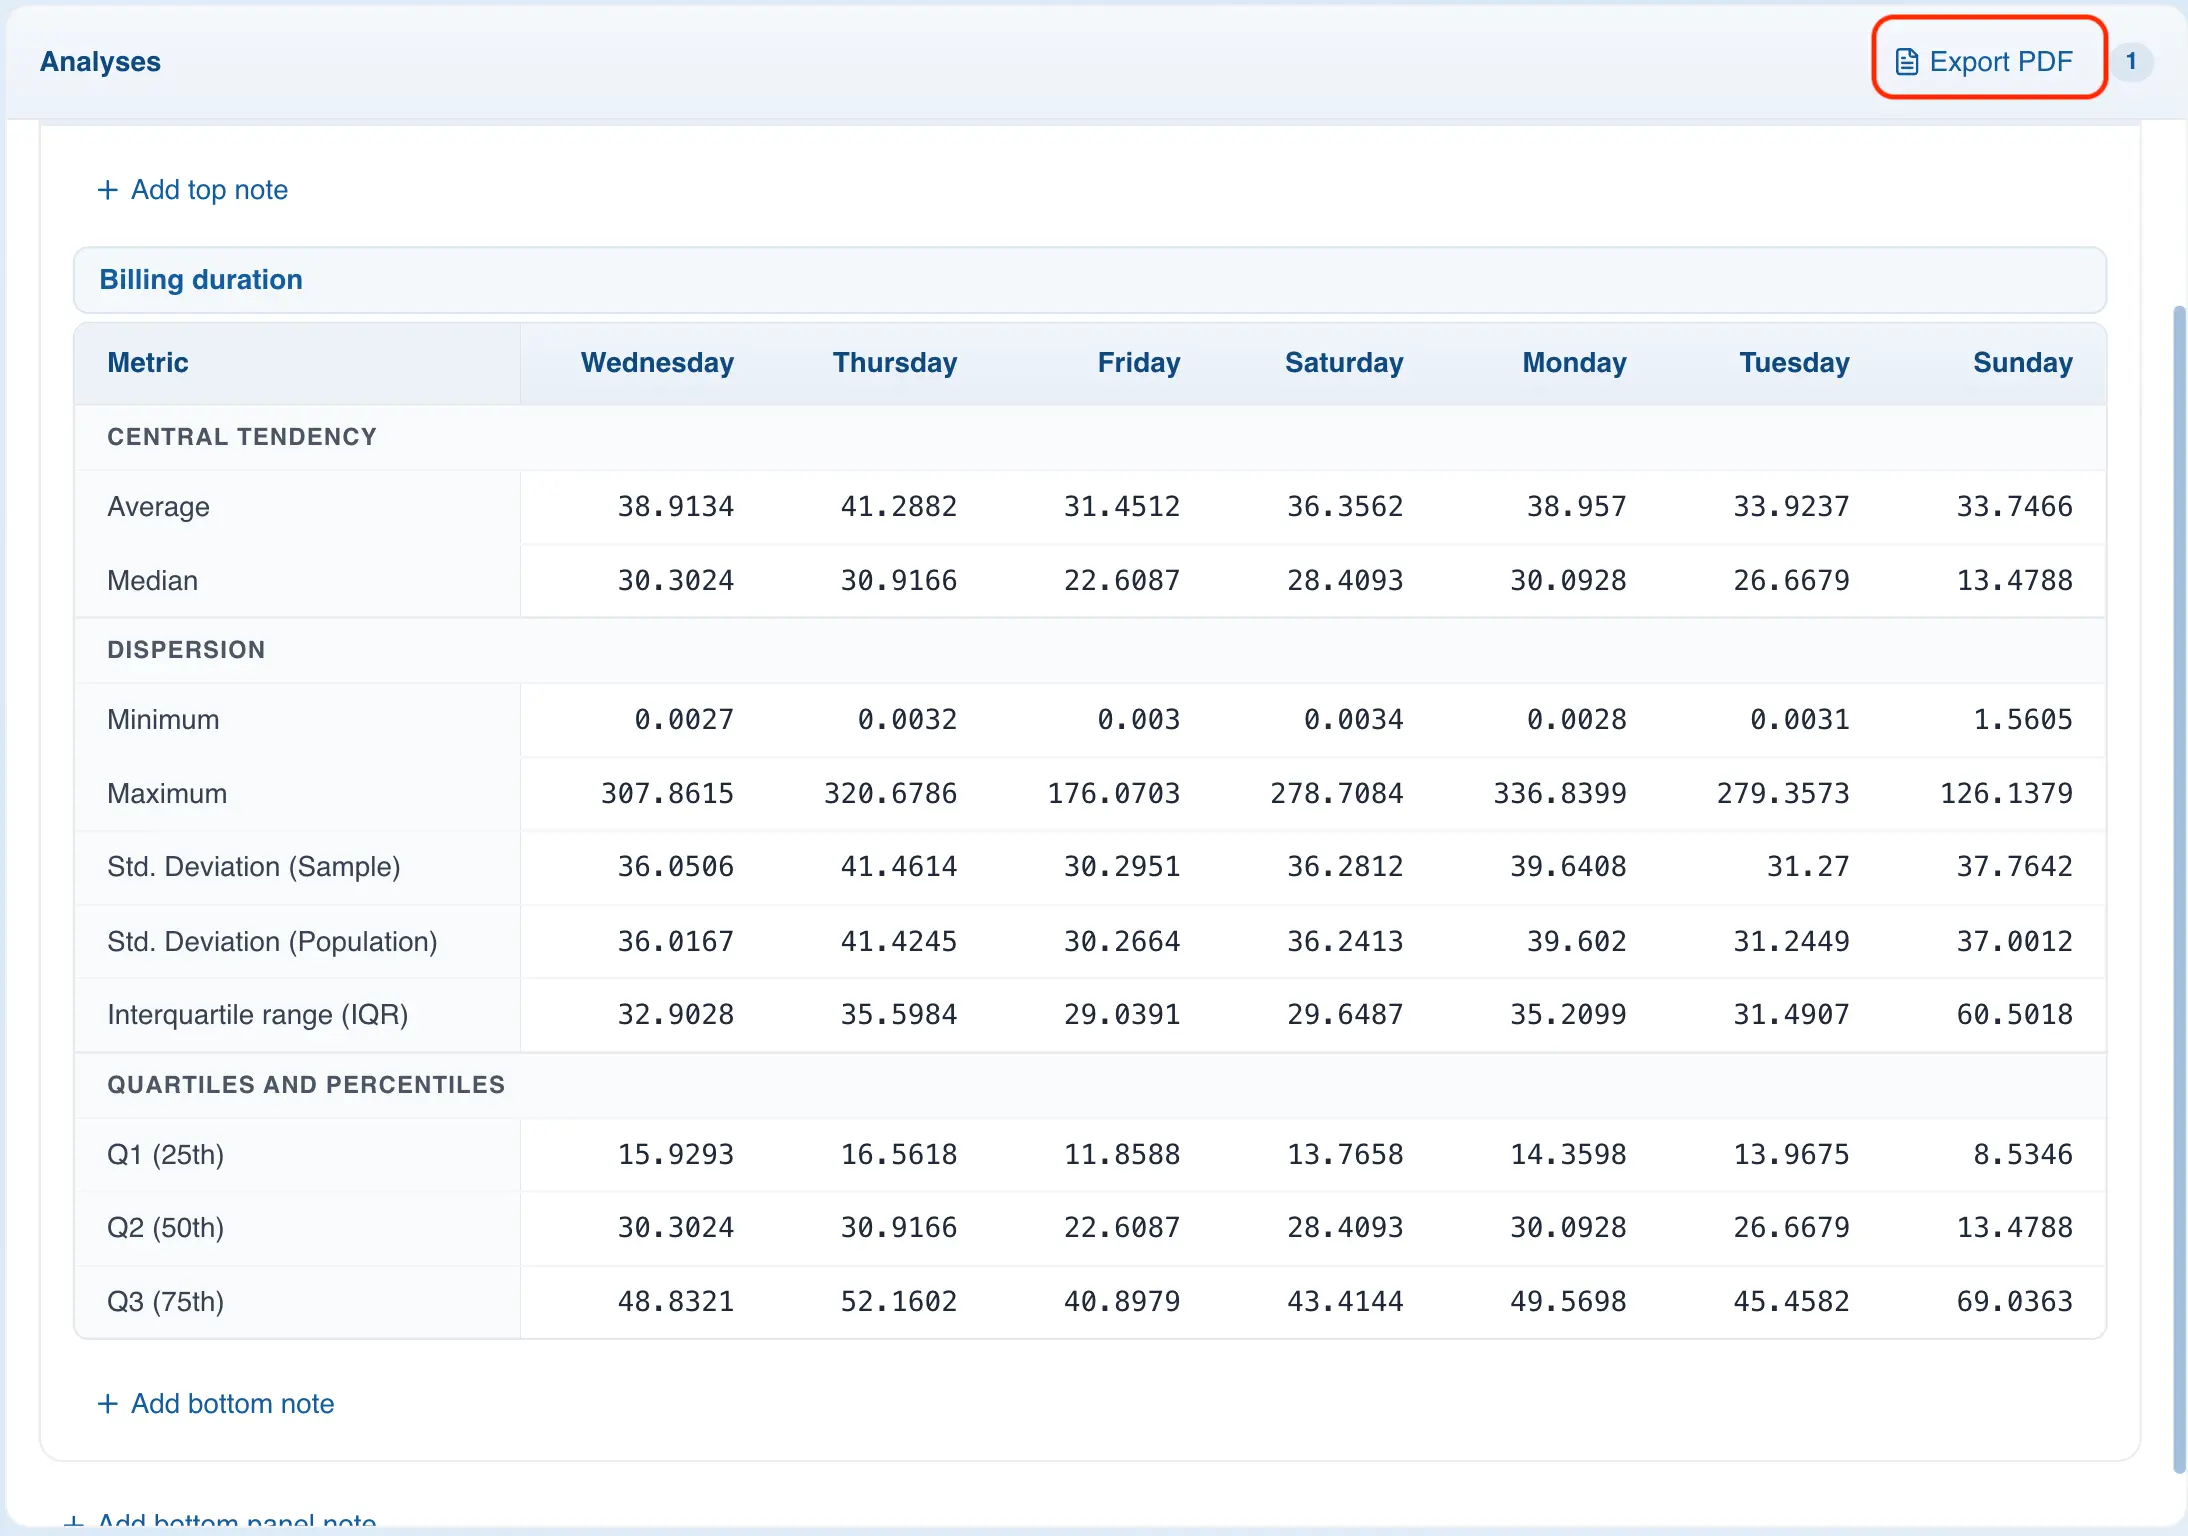
Use the "Export PDF" option to export your analyses to a PDF file that you can share for team meetings, audits, and reviews.
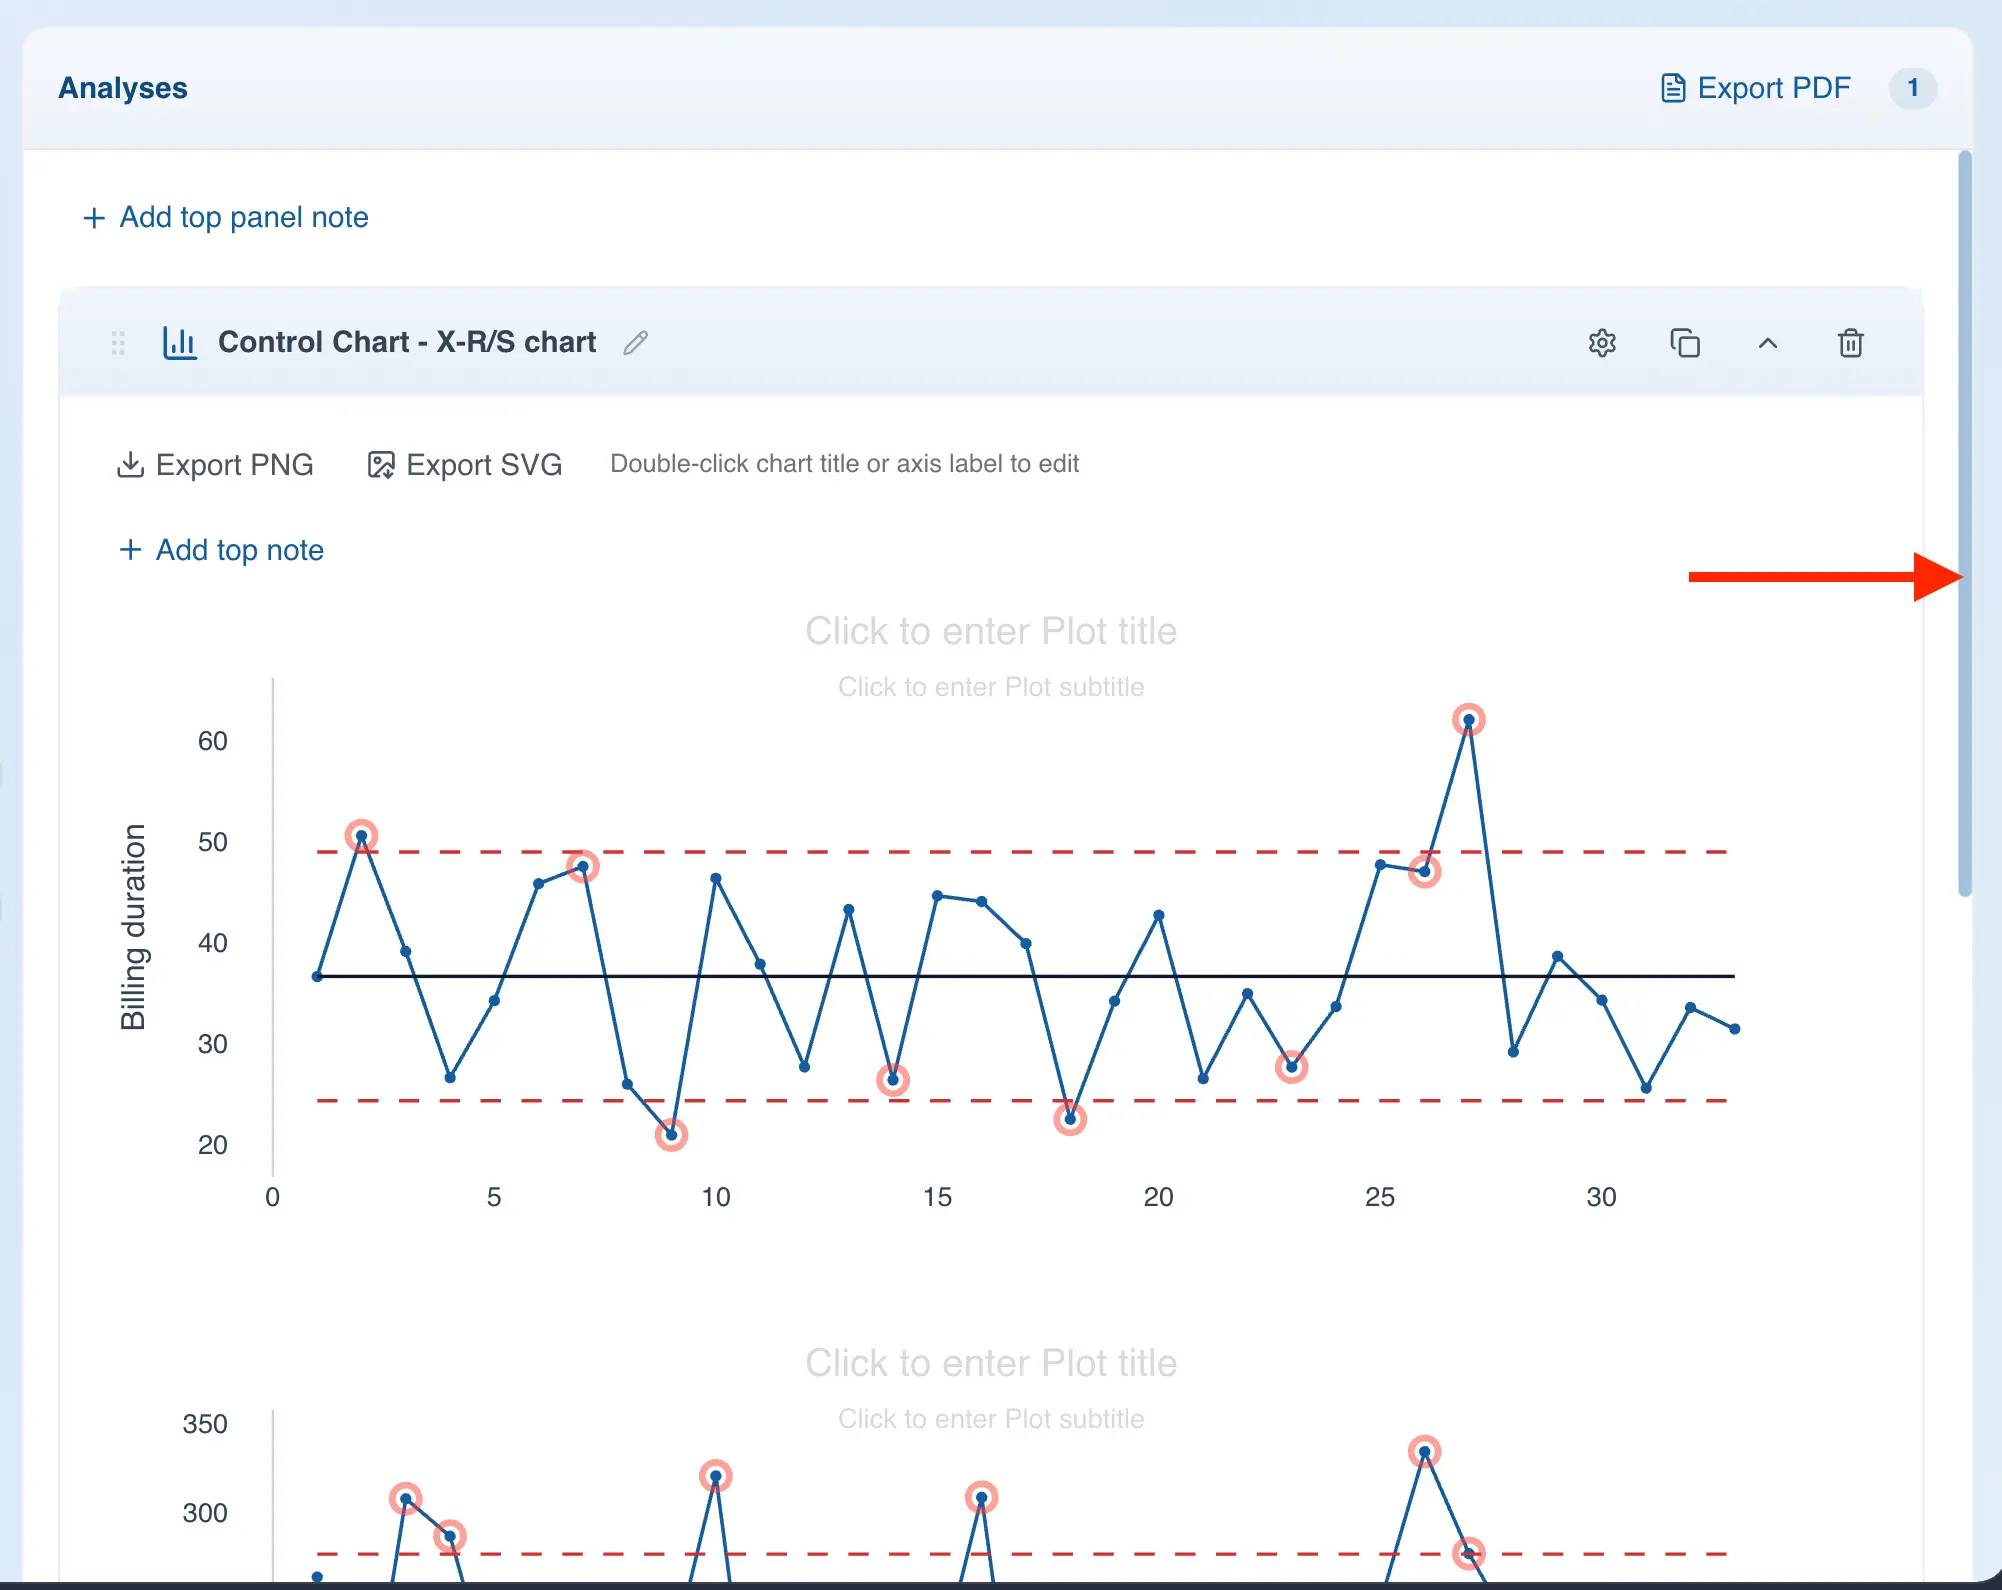
Navigating the Analysis Panel
The QSuite analysis panel has a scroll bar that lets you scroll up or down to see hidden content. This bar is located on the right side of the panel as shown in the image below.
Renaming an Analysis
You can rename an analysis by clicking the ![]() icon located next to the analysis title. When the text box appears, type the name and press "Enter" to save your changes.
icon located next to the analysis title. When the text box appears, type the name and press "Enter" to save your changes.
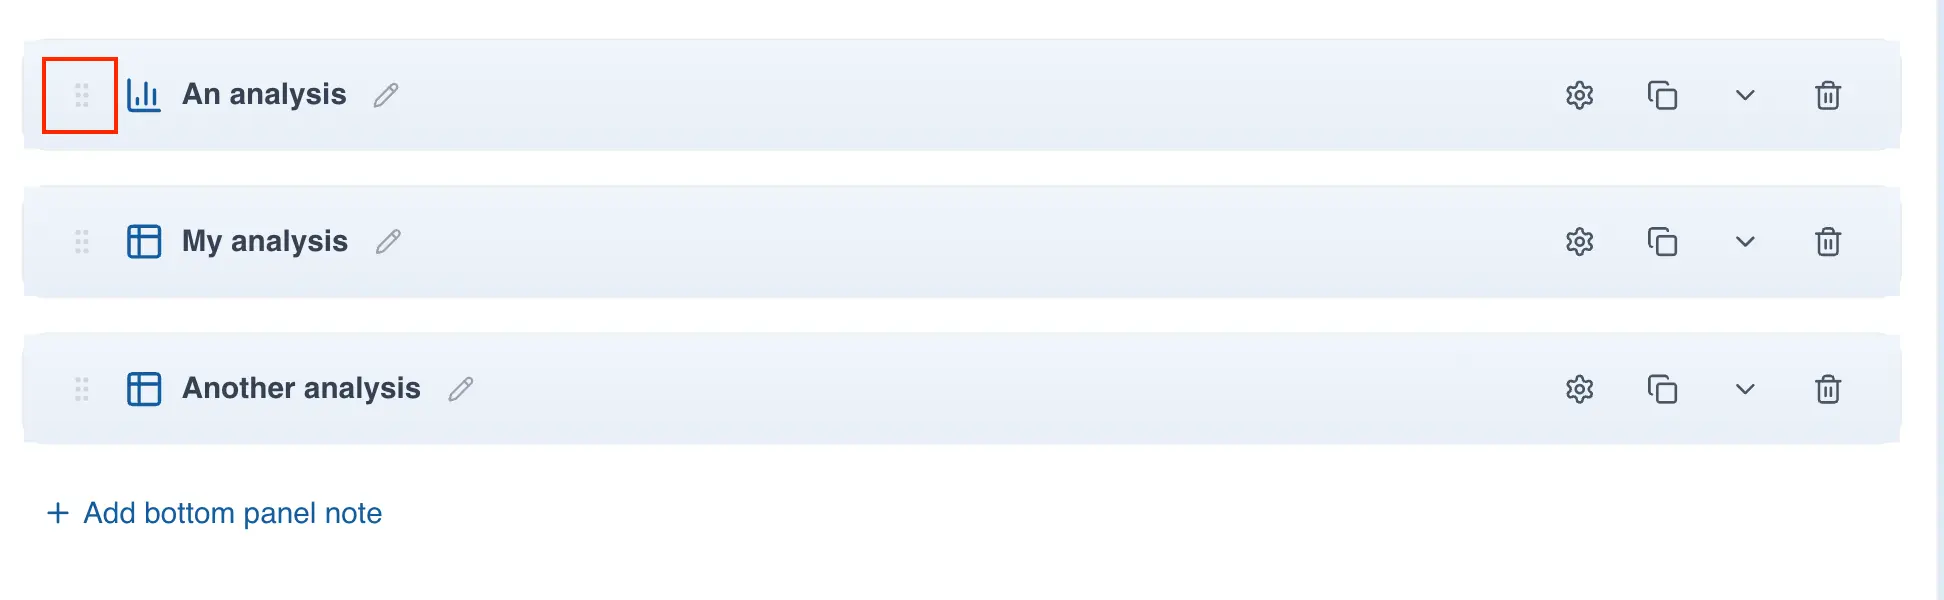
Reordering Analyses
You can move an analysis by hovering over the drag-and-drop icon located to the left of the analysis title. Hold the cursor in this area and drag up or down to reposition the analysis.
Saving Your Data
Exporting Your Work
QSuite keeps your data in browser memory, so you should save your work regularly to avoid losing it. If you clear your browser cache, your data will be lost.
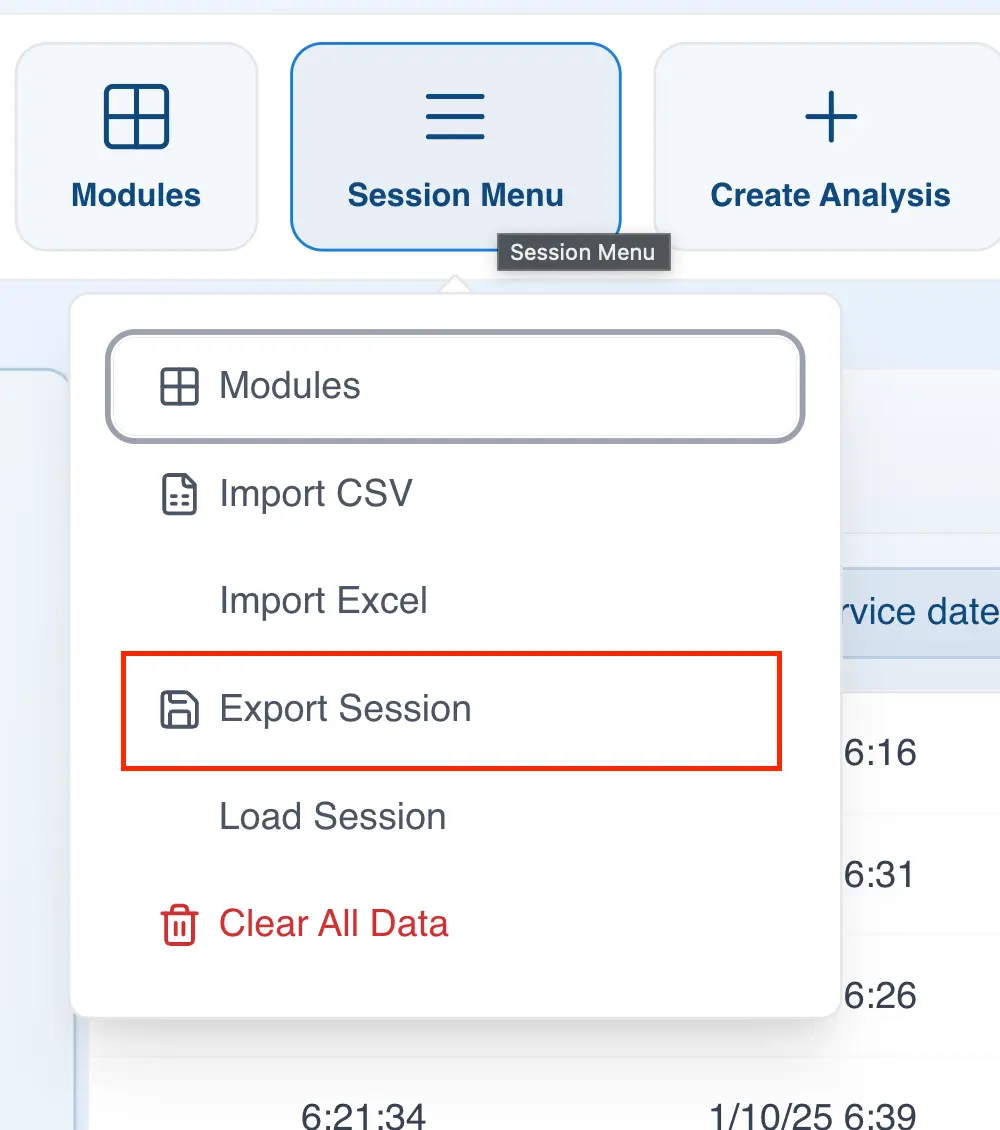
To save your data, follow these steps:
- Click on the session menu
- Click "Export Session"
You can also save your work by clicking the ![]() icon in the quick access bar.
icon in the quick access bar.
Loading a Previous Session
If you want to open a previously saved analysis, just follow these steps:
- Click on the session menu
- Click "Load Session"
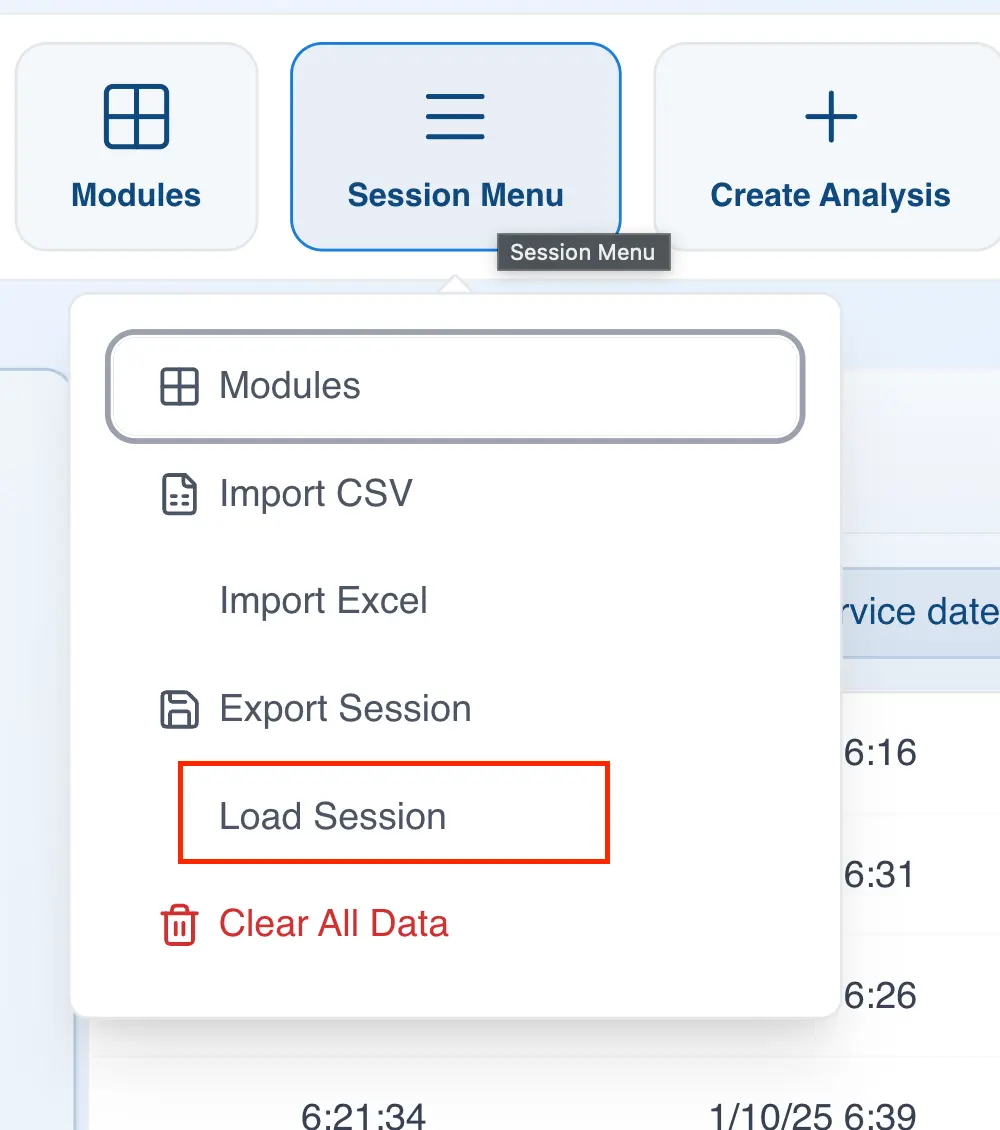
Your data and analyses will load exactly as you left them.